
To paint your nails like a pro, start by wiping your brush to remove excess polish. Apply thin layers, beginning half a centimeter from the cuticle, and wait about eight minutes between each layer. Don't forget to finish with a topcoat for that shiny, long-lasting look. If you make mistakes, clean them up immediately with polish remover and a small brush. Keep going, and you'll discover more tips for achieving flawless nails.
Key Takeaways
- Start with a clean nail surface and apply a thin base coat to protect the nail.
- Use a brush to apply polish, leaving a small space from the cuticle for a neat finish.
- Apply polish in thin layers, waiting about eight minutes between each for proper drying.
- Finish with a high-quality topcoat to seal color and enhance shine while preventing chipping.
- Clean up any mistakes immediately with a small brush and nail polish remover for a flawless look.
Top picks for "paint nail"
Open Amazon search results for this keyword.
As an affiliate, we earn on qualifying purchases.
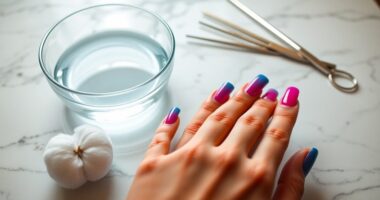
Always Wipe

When you want a clean and polished look for your nails, always wipe the brush before you start. Dab the far side of the brush on the bottleneck to remove excess polish, preventing it from flooding your cuticle area. This simple step helps you apply a thin layer of polish while keeping the edges neat.
Begin painting about half a centimeter away from the cuticle, maintaining a hairline space between the polish and your skin for a professional finish. Don't forget to repeat the wiping process on both sides of the nail for even coverage.
If you do make mistakes, use nail polish remover to clean up any errors easily, ensuring your manicure looks flawless every time. Additionally, maintaining proper skin hydration can enhance the overall appearance of your hands and nails.
Paint in Thin Layers

After ensuring your brush is clean and the edges are neat, focus on applying your polish in thin layers. This technique not only speeds up drying time but also minimizes the risk of smudging.
Here's how to do it effectively:
- Start with a thin base coat to protect your nail plate.
- Apply the first layer of color—aim for a streaky look; you'll build on this.
- Wait about eight minutes for the layer to dry before adding a second coat.
- Finish with a top coat to seal everything and enhance shine. Additionally, using affordable styles can help you look polished while saving money on haircuts.
Remember the Ugly Duckling? He's a Swan Now

Just as the Ugly Duckling underwent a remarkable transformation into a beautiful swan, your nail painting skills can flourish with a little patience and practice. Start by properly preparing your nails; this is your solid foundation. Heat pumps, for instance, also require proper installation to ensure optimal performance and efficiency.
Layer thin coats of nail polishes to gradually build opacity, just like the Ugly Duckling grew his elegant feathers. Embrace the waiting period between layers, ensuring each coat dries fully before adding the next. Finally, don't forget to moisturize your nails to keep them healthy and vibrant.
| Step | Action |
|---|---|
| 1 | Prepare your nails |
| 2 | Apply thin layers |
| 3 | Wait between layers |
| 4 | Moisturize and finish |
With these steps, your nails will shine like a swan!
How Long Do You Wait Between Each Layer of Nail Polish?

How long should you wait between each layer of nail polish to achieve that flawless finish? To get it right, follow these tips:
- Wait approximately eight minutes between each layer to guarantee it's dry to the touch.
- Apply thin coats for better drying and a smoother appearance.
- Limit layers to three, as more can lead to drying issues and reduced durability.
- Check the temperature of your nail before applying a new layer; it should feel cool.
Rushing the process can result in smudging and an uneven finish. Additionally, maintaining good overall health, including dental health, can positively influence your nail care routine.
By giving each layer the proper time to dry, you'll enjoy a polished look that lasts longer and looks professional.
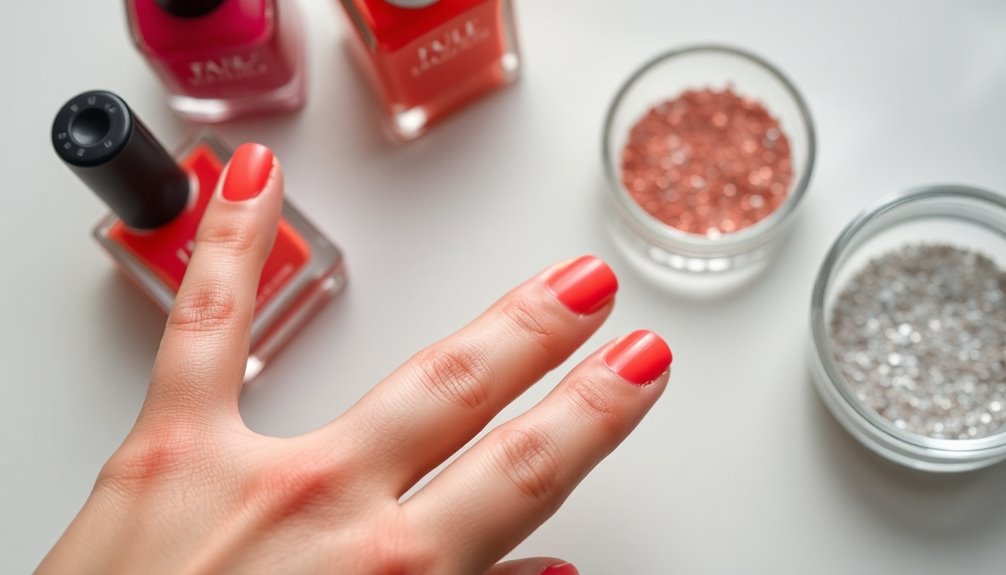
The Key Has Been Topcoat All Along

A stunning manicure often hinges on one crucial element: the topcoat. This essential layer hardens quickly, protecting your colored polish from chipping and wear, ensuring a long-lasting finish.
High-quality topcoats, like Cirque Colors Looking Glass and Dazzle Dry Quick Top Coat, not only enhance the shine of your nails but also smooth out any imperfections from the color layers beneath. To achieve the best results, allow 10–20 minutes for the topcoat to dry completely. For added benefits, use cuticle oil after applying the topcoat; it improves the appearance of your nails and speeds up the drying process. Additionally, consider pairing your manicure with a fun dessert option to celebrate your freshly polished nails!
How to Clean Up a Messy Application?

If you've ended up with polish on your skin, don't worry—you can easily fix it.
Grab a small brush dipped in nail polish remover to clean around your cuticles and any areas where the polish strayed.
For future applications, consider applying cuticle oil to create a barrier that makes cleanup even easier. Additionally, using a heartfelt female religious birthday wish can uplift your spirit and encourage mindfulness during your self-care routine.
Use Nail Polish Remover
Cleaning up a messy nail polish application can be a breeze with the right technique. Here's how to effectively use nail polish remover to clean up around the cuticle area:
- Choose the Right Remover: Opt for an acetone-based nail polish remover for stubborn mistakes.
- Use a Brush or Swab: Dip a small brush or cotton swab into the remover, ensuring it's not oversaturated.
- Clean Up Immediately: Tackle any excess polish right after application to prevent it from drying.
- Allow to Dry: After cleaning up, let the area dry before applying your topcoat for a smooth finish.
Additionally, using nail polish remover can be especially helpful if you have pimple patches on, as it prevents any unwanted residue from sticking to your skin.
With these steps, you'll easily achieve a polished look without any messy mistakes!
Clean With a Brush
Grab a small, angled brush dipped in nail polish remover to tackle any messy application around your cuticles. This is your secret weapon for achieving a neat finish.
Wipe the brush on a paper towel after dipping it in remover to prevent excess liquid from smudging or flooding the area. Focus on one side of the nail at a time, cleaning up as you go to maintain precision.
For smaller areas or intricate designs, use a cotton swab dipped in remover for more detailed clean-up. Just make sure you let the polish dry completely before attempting any clean-up, as this will help you avoid smudging the color underneath. Additionally, achieving a high refresh rate can enhance your overall nail painting experience, allowing for quicker, more precise applications.
Your nails will look flawless in no time!
Apply Cuticle Oil
After you've achieved a clean finish around your cuticles, it's time to apply cuticle oil for an even tidier look. This will soften any excess polish and make cleanup easier. Here's how to do it:
- Apply cuticle oil around the nail beds to nourish your skin.
- Use a wooden stick or small brush dipped in nail polish remover to gently push back any flooded polish.
- Massage the cuticle oil into your skin to help dissolve stubborn polish remnants.
- Wait until the polish is fully dry before cleaning up to minimize smudging.
Always keep a cotton swab or small brush handy to quickly correct any mistakes while the polish is still fresh. Additionally, using quality ingredients in your nail products can contribute to healthier nails and cuticles.
Your nails will look polished and professional!
Frequently Asked Questions
What Is the Proper Way to Paint Your Nails?
To paint your nails properly, start by prepping them with a base coat to prevent staining.
Once that's dry, grab a high-quality brush and dip it in polish, wiping the sides to avoid excess.
Apply in thin, even layers, allowing each coat to dry for about eight minutes.
After two to three coats, finish with a topcoat for shine and protection.
Remember to keep a small gap from your cuticles for a neat finish!
How Do You Apply Nail Polish Properly?
To apply nail polish properly, you'll want to start with a base coat on clean, dry nails.
Use a thin brush technique, applying polish in the center and swiping on both sides for even coverage.
Go for thin layers, letting each dry for about eight minutes before adding more.
Limit yourself to two or three layers to avoid smudging, and finish with a topcoat for protection and shine.
Allow it to dry completely!
How to Do Your Nails for Beginners?
To do your nails as a beginner, start by prepping them. Gently push back your cuticles and apply some moisturizing product.
Next, use a base coat to protect your nails. When you apply polish, use thin layers for even coverage. Wait for each layer to dry completely before adding more.
Finish off with a topcoat for shine and durability. Allow your nails to dry well, and you'll have a fresh, polished look!
How to Paint Nail Tips for Beginners?
When painting nail tips, start by ensuring your nails are clean and dry.
Use a steady hand and a fine brush to carefully apply polish to the tips, moving from the center outward. Keep a slight gap between the polish and your skin for a neat finish.
Don't rush; allow each layer to dry for about eight minutes before applying the next.
A topcoat at the end adds shine and durability to your manicure.
Conclusion
Now that you know the essentials of nail painting, it's time to put your skills to the test. Remember to wipe, layer thinly, and wait patiently. Embrace the transformation from plain to polished, and don't forget that a topcoat seals the deal. If you make a mess, clean it up with ease. With practice and patience, your nails will shine bright and stand out, making every application a masterpiece you can be proud of.