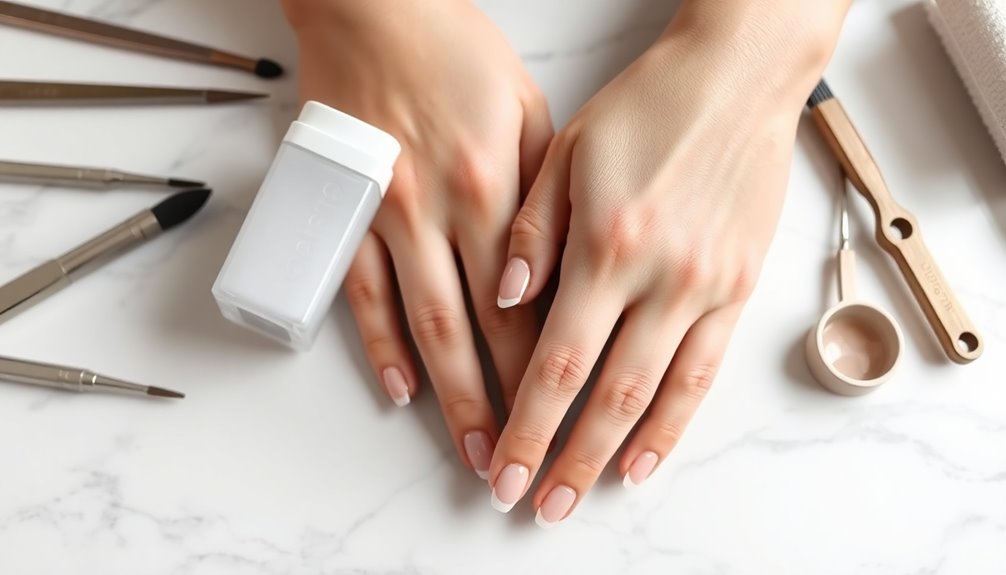
To prep your nails for gel polish, start by shaping and trimming them to your desired length. Clean your nails and push back your cuticles, making sure to remove any dead skin. Then, cleanse and dehydrate your nails using a lint-free wipe and a pH bonder. Apply a base coat for protection and better adhesion. Finally, apply gel polish in thin layers, curing each under a UV/LED lamp. There's more to achieve a stunning manicure!
Key Takeaways
- Trim and shape nails to your desired length and ensure all edges are smooth and even.
- Soften cuticles with a remover and gently push them back for a clean application area.
- Cleanse nails with alcohol or a nail cleanser to remove oils and debris before applying polish.
- Apply a pH bonder or dehydrator to ensure nails are dry and ready for gel polish adhesion.
- Always use a base coat to protect nails and enhance the longevity of the gel polish.
Importance of Nail Preparation for Gel Polish

Nail preparation is essential if you want your gel polish to adhere properly and look stunning. When you invest time in nail prep, you're not just ensuring a beautiful finish; you're also setting the stage for long-lasting results.
A well-prepped nail bed minimizes the risk of chipping and lifting, which can ruin your manicure. If you skip this vital step, you might face premature lifting and an overall shorter lifespan for your gel polish.
Additionally, proper preparation helps maintain the health of your natural nails, reducing the risk of damage. With good nail prep, you'll enjoy improved adhesion and less maintenance, leading to a polished, professional look that lasts. Proper preparation is just as important as using high-quality products to achieve the best results.
Step-by-Step Nail Preparation Process

To get your nails ready for gel polish, you'll want to start with proper shaping techniques that keep them strong and beautiful. Then, focus on cuticle care to create a clean canvas for application. Finally, don't forget to cleanse and dehydrate your nails to guarantee the polish adheres perfectly. Additionally, using the right nail preparation techniques can significantly enhance the longevity of your gel polish.
Nail Shaping Techniques
Achieving the perfect nail shape is essential for a flawless gel polish application. Start by trimming your nails to your desired length with nail clippers, cutting straight across to maintain strength and prevent splitting.
Next, use a nail file to shape your nails in one direction, choosing from forms like square, oval, or almond for a consistent edge. Focus on filing from the outer edges toward the center to preserve the nail's structural integrity.
After shaping, lightly buff the nail surface with a fine grit buffer to remove shine, creating a textured surface that enhances gel polish adhesion. Consider using base coats to further protect your natural nails and improve the overall finish.
Finally, verify all nails are evenly shaped and free of any sharp edges for a neat, professional look before applying gel polish.
Cuticle Care Essentials
After shaping your nails, it's important to focus on cuticle care for a polished finish.
Start by applying a cuticle remover to soften the cuticles for about 60 seconds. This makes the removal process easier.
Next, gently push back the softened cuticles using a cuticle pusher, being careful not to damage the live skin.
Then, use cuticle nippers to carefully remove any dead skin, focusing only on the dead areas to avoid bleeding and infection.
Make sure there's no cuticle overlapping the nail bed, as this can cause lifting of the gel polish.
Finally, clean the area around your nails to promote a tidy appearance and enhance polish adhesion. Regularly maintaining cuticle care can lead to healthier nails and better gel polish application.
Cleansing and Dehydrating Steps
Cleansing and dehydrating your nails is vital for guaranteeing gel polish adheres properly and lasts longer.
Start by using a lint-free wipe soaked in nail cleanser or alcohol to remove dirt, oils, and debris from the nail surface. This step is essential for ideal gel polish adhesion.
After filing and buffing, use a manicure brush to eliminate any dust, as leftover particles can interfere with your application.
Then, apply a pH bonder or dehydrator to the nail plate to remove moisture and further prepare the surface.
Be thorough in your cleansing process, and always allow your nails to dry completely after dehydrating. This guarantees the gel polish bonds effectively to your nail surface for a long-lasting finish. Additionally, ensure you are using cruelty-free products to support ethical beauty standards in your nail care routine.
Preparing Cuticles

Preparing your cuticles is essential for a flawless gel polish application. Start by softening your cuticles with a cuticle remover for about 60 seconds. This will make it easier to push them back.
Next, use a wooden or metal cuticle pusher to gently push back the cuticles, ensuring you don't damage the live skin or nail bed.
Here are three key steps to follow:
- Soften: Apply cuticle remover to soften cuticles.
- Push: Use a cuticle pusher to carefully push back cuticles.
- Remove: Remove dead skin around the cuticle area to prep nails for gel polish application.
Regular cuticle care not only enhances your manicure's appearance but also promotes healthier nail growth. Additionally, maintaining proper nail health can contribute to overall mental health status, as engaging in self-care routines positively impacts mental well-being.
Nail Shaping and Cleaning

Start by shaping your nails to achieve the perfect look before applying gel polish. Choose your desired nail shape—square, round, or almond—and trim them to your preferred length using nail clippers or a file. Use a 100/180 grit nail file, filing in one direction to maintain nail integrity. Smooth the edges by filing from the sides toward the center. To enhance gel polish adhesion, slightly roughen the nail surface with a soft file, but avoid excessive filing. Additionally, ensuring your nails are properly cleansed can significantly improve the longevity of your gel polish.
Next, cleanse the nail plate with a cleanser or alcohol on a lint-free pad to remove grease and dust, ensuring ideal adhesion for gel polish.
| Step | Action | Purpose |
|---|---|---|
| 1. Trim | Use clippers or file | Set desired length |
| 2. File | Shape with 100/180 grit | Maintain nail integrity |
| 3. Smooth Edges | File towards center | Achieve even edges |
| 4. Roughen | Use a soft file | Enhance gel polish adhesion |
| 5. Cleanse | Wipe with cleanser | Remove debris and grease |
Base Coat Application and Benefits

Once you've shaped and cleaned your nails, applying a base coat is crucial for achieving a flawless gel manicure.
The base coat not only creates a smooth surface for your gel polish but also enhances its overall appearance.
Here are three key benefits of using a base coat:
- Protection: It shields your natural nails from staining, preventing discoloration over time.
- Improved Adhesion: A well-applied base coat enhances the adhesion of the gel polish, increasing its longevity and minimizing premature lifting.
- Clean Application: Avoid touching the cuticles with the base coat to guarantee a neat finish and prevent lifting. Additionally, using a base coat can improve your gel polish's durability, similar to how high refresh rates enhance gaming experiences in projectors.
Tips for Long-Lasting Gel Manicure

To achieve a long-lasting gel manicure, nail preparation is key.
Start by ensuring your nails are clean and dehydrated, which helps the polish adhere better.
Proper product application, including a high-quality base coat, can greatly boost the durability of your manicure. Additionally, using research-backed articles can provide you with credible information on the best products and techniques for nail care.
Nail Preparation Techniques
Preparing your nails properly is essential for achieving a long-lasting gel manicure. Start by following these nail preparation techniques to guarantee the best results:
1. Trim and Shape: Use nail clippers to trim your nails and shape them with a file. This helps create a neat appearance and a solid foundation for your gel polish.
2. Buff and Cleanse: Buff the nail surface with a fine grit buffer to create texture, which improves gel polish adhesion.
Then, cleanse your nails with a prep solution to remove oils and debris.
3. Cuticle Care: Gently push back your cuticles with a cuticle pusher to increase the application area and prevent lifting. Proper nail care techniques can significantly enhance the durability of your gel manicure.
Proper Product Application
Achieving a long-lasting gel manicure hinges on proper product application. First, always prep your nails with a base coat. This protects your natural nails and enhances gel adhesion. Next, use a self-leveling gel polish to guarantee an even finish. Remember to leave about 1mm from the cuticle to avoid lifting.
| Step | Action |
|---|---|
| 1. Base Coat | Apply after prep to protect and adhere. |
| 2. Gel Polish | Use self-leveling polish for a smooth look. |
| 3. Curing | Cure each layer under a UV/LED lamp. |
| 4. Top Coat | Finish with a no-wipe top coat for shine. |
Follow these steps for a durable and beautiful gel manicure!
Frequently Asked Questions
How Do You Prep Your Nails for Gel Polish?
To prep your nails for gel polish, start by trimming and shaping them to your preferred length.
Gently push back your cuticles, ensuring they don't overlap the nail bed.
Buff the surface lightly to create a rough texture for better adhesion.
Clean your nails with a nail cleanser to remove any oils or debris.
Finally, apply a base coat carefully, avoiding your cuticles, and let it cure properly for a solid foundation.
What Do I Clean My Nails With Before Gel Polish?
To clean your nails before gel polish, you'll want to use a Prep & Wipe solution on a lint-free wipe. This effectively removes dirt and oils, ensuring a clean surface.
Alternatively, you can opt for alcohol or a dedicated nail cleanser like CND Nail Fresh.
Always remember to cleanse after filing and buffing to eliminate any dust. A clean nail plate is essential for better adhesion and to prevent lifting or chipping.
Do You Need to Prime Nails Before Gel Polish?
Yes, you need to prime your nails before applying gel polish.
Priming enhances adhesion and prevents lifting or chipping, ensuring your manicure lasts longer. By removing excess moisture and oils, a nail primer creates the perfect base for gel products.
After cleansing and buffing, apply the primer for maximum effectiveness. Skipping this step can lead to premature lifting, so don't overlook it if you want a flawless and long-lasting finish.
Can I Use Acetone to Prep for Gel Nails?
Imagine your nails transforming into a stunning canvas ready for art.
You can definitely use acetone to prep for gel nails. It cleanses your nail plate, removing oils and residues that can affect adhesion.
Just remember, moderation is key; too much acetone can dry out your nails. After using it on a lint-free pad, follow up with a moisturizer to keep your nails healthy and strong for that flawless gel polish finish.
Conclusion
So, you thought you could just slap on some gel polish without prep? Surprise! Nail preparation isn't just a tedious chore; it's the secret sauce to a flawless, long-lasting manicure. By taking the time to pamper your nails—shaping, cleaning, and applying that all-important base coat—you're not just following steps; you're treating your nails to a mini spa day. Who knew that a little effort could lead to such glamorous results? Your nails will thank you!


