To use Liquid Nails, first choose the right type for your materials. Prepare the adhesive by cutting the nozzle for control, then load it into a caulk gun. Apply it in a zigzag pattern on clean surfaces for ideal bonding. Stop the flow by releasing the trigger. Allow it to cure for up to 7 days, depending on conditions. Clean up any excess adhesive promptly and discover tips to troubleshoot common issues for a successful project.
Key Takeaways
- Choose the appropriate Liquid Nails product based on your materials and project requirements, such as Heavy Duty or Fast Grab.
- Prepare the adhesive by cutting the nozzle tip and ensuring surfaces are clean and free from debris.
- Load the Liquid Nails tube into a caulk gun, extruding adhesive in a zigzag pattern for optimal bonding.
- Allow for initial drying within 15 minutes, but wait 24 hours before removing temporary fasteners for best results.
- Store leftover adhesive in a cool, dry place to maintain its usability for future projects.

Microsoft Surface Go 2-10.5" Touch-Screen - Intel Core m3-8GB Memory - 128GB SSD - WiFi - Platinum Windows 11 PRO (Renewed)
10.5" PixelSense 10-Point Touch Display | UP TO 3.4Hz Intel Core m3 Processor | Amazon Renewed | Microsoft...
As an affiliate, we earn on qualifying purchases.
Choose the Right Liquid Nails for Your Project

When you're ready to tackle your project, how do you choose the right Liquid Nails?
First, consider the materials you're working with. For general use on tiles, baseboards, and drywall, Heavy Duty or Fuze*It Liquid Nails are your best bets for a strong bond.
If you're fixing nail pops, reach for the Drywall Adhesive variant tailored for that task.
For outdoor projects, Liquid Nails Exterior is designed to resist heat, water, and UV damage.
If you need strong initial holding power, Liquid Nails Fast Grab is perfect, especially in low-odour environments.
Finally, when working with transparent surfaces like glass or plastics, Liquid Nails Clear offers a clear bond without affecting appearance.
Choose the right Liquid Nails for your project to guarantee success! Additionally, ensure that the adhesive you select is suitable for energy-efficient options to enhance your project's overall sustainability.

Apple iPad 11-inch: A16 chip, 11-inch Model, Liquid Retina Display, 128GB, Wi-Fi 6, 12MP Front/12MP Back Camera, Touch ID, All-Day Battery Life — Blue
WHY IPAD — The 11-inch iPad is now more capable than ever with the superfast A16 chip, a...
As an affiliate, we earn on qualifying purchases.
Prepare the Adhesive for Application

Start by preparing the Liquid Nails adhesive for a smooth application. First, use a utility knife to cut the tip of the Liquid Nails nozzle, controlling the flow of adhesive.
If you're using Fuze*It versions, unscrew the nozzle, cut the tip, and reattach it after puncturing the inner seal with a nail or pin. Make certain the nozzle is free from debris before you proceed.
Also, guarantee that the surfaces you plan to bond are clean and free from oil, grease, and dust. Color accuracy is important for ensuring that the adhesive adheres well to different materials.
While a caulk gun is recommended for easy application, you can squeeze the tube manually if you don't have one.
Finally, properly dispose of any unused adhesive to avoid waste and guarantee safety.

SZTPS 10.1" Windows Tablet Touchscreen Tablets Computer 6GB RAM 128GB ROM, Intel Processor, USB 3.0, Micro HDMI, 6000MAH Battery, Dual Cameras, Bluetooth 5.0
【Long-Lasting Battery】:6000mAh built-in rechargeable battery, can be mixed for 5-12 hours, and is equipped with charger, data cable,...
As an affiliate, we earn on qualifying purchases.
Load Liquid Nails Into a Caulk Gun

Before you begin applying Liquid Nails, you'll need to load the adhesive into a caulk gun for efficient use.
First, select the appropriate Liquid Nails adhesive for your project, ensuring it's compatible with your materials.
Use a utility knife to cut the tip of the Liquid Nails tube, controlling the size of the opening based on how much adhesive you want to flow.
Next, insert the back end of the tube into the caulk gun's cradle and push the front tip into position.
Once loaded, you can pull the trigger to extrude the adhesive. To stop the flow, simply release the front trigger and pull the back trigger to retract the rod in the caulk gun.
Make sure to store any leftover Liquid Nails in a cool, dry place to prevent temperature above 80°F from affecting its integrity and usability.

2-in-1 Laptop Tablet 2026 with Magnetic Keyboard & 1-Year Office 365, 12" 2K FHD IPS Touchscreen, 12GB RAM 512GB SSD, 6500Y Processor, USB-C, Dual Speakers, Windows 11 Laptop for Home Office Students
START WORKING IMMEDIATELY with a full 1-Year Office 365 Subscription - pre-installed on this versatile 2-in-1 device. Seamlessly...
As an affiliate, we earn on qualifying purchases.
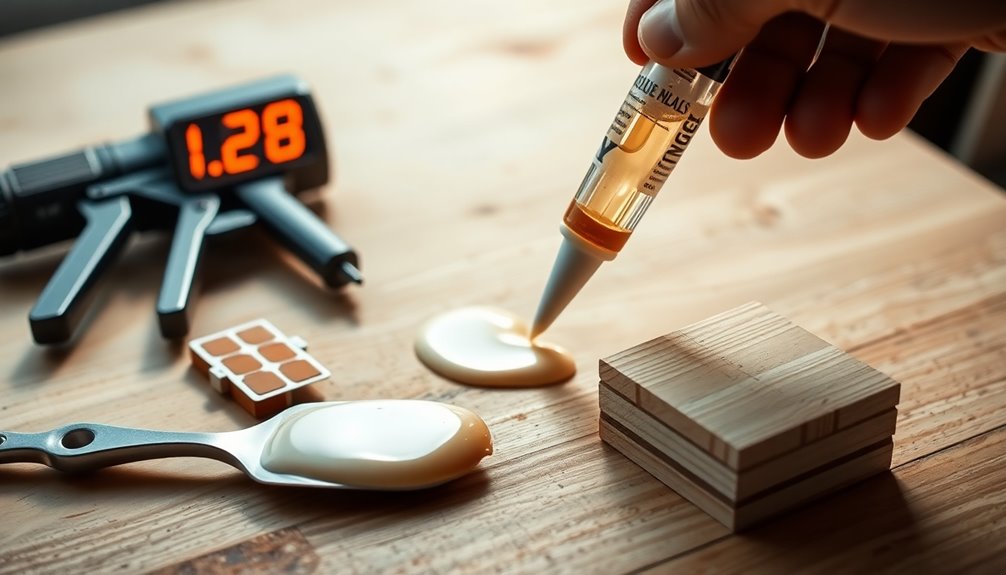
Apply Liquid Nails in a Zigzag Pattern

To achieve an even application of Liquid Nails, extrude the adhesive in a zigzag pattern across the surface.
Using a caulk gun, maintain about 4 inches between the zigzag lines while ensuring they overlap for heavier materials. This technique helps distribute the adhesive better and creates a stronger, more flexible bond once it cures.
Before you start, make sure the surfaces are clean and free from debris to get the best results.
When you apply Liquid Nails this way, you'll notice improved adhesion and durability in your projects. Additionally, using natural materials in your projects can further enhance the overall aesthetic and strength of the bond created by the adhesive.
Remember, the zigzag pattern isn't just for aesthetics; it's a practical method for maximizing bonding strength.
Stop the Adhesive Flow Correctly

Stopping the adhesive flow correctly is essential for achieving a neat and professional-looking application.
When using Liquid Nails, release the front trigger of the caulk gun while simultaneously pulling the back trigger to cut off the adhesive cleanly. This technique helps you avoid messy drips.
To maintain control, apply pressure on the nozzle for precise adhesive release, minimizing waste. It's a good idea to practice this motion before your project starts, ensuring you're comfortable with the trigger mechanism.
If you're using a manual squeeze tube, simply release pressure on the tube to stop the flow.
For a clean finish, avoid dragging the nozzle across surfaces after stopping; this prevents unwanted adhesive smears, keeping your work tidy. Additionally, ensure proper airflow around the unit to enhance performance and reduce environmental factors that could affect your project.
Understand the Curing Process
Understanding the curing process of Liquid Nails is essential for achieving a strong, lasting bond. Liquid Nails dries within 15 minutes, but for a permanent bond, it requires about 7 days to cure completely. Keep in mind that environmental conditions like temperature and humidity can affect this curing time.
| Time Frame | Description |
|---|---|
| 15 minutes | Initial drying time |
| 30 minutes | Temporary stability developed |
| 24 hours | Recommended wait before removing temporary fasteners |
Under ideal conditions, full drying typically takes 2-3 days. Be patient and allow at least 24 hours for the adhesive to set before removing any supports, ensuring you get the best results from your Liquid Nails application. Additionally, understanding the importance of robust safety measures in various applications can enhance your project's overall effectiveness.
Clean Up After Using Liquid Nails
Once you've allowed Liquid Nails to cure properly, it's important to focus on the clean-up process.
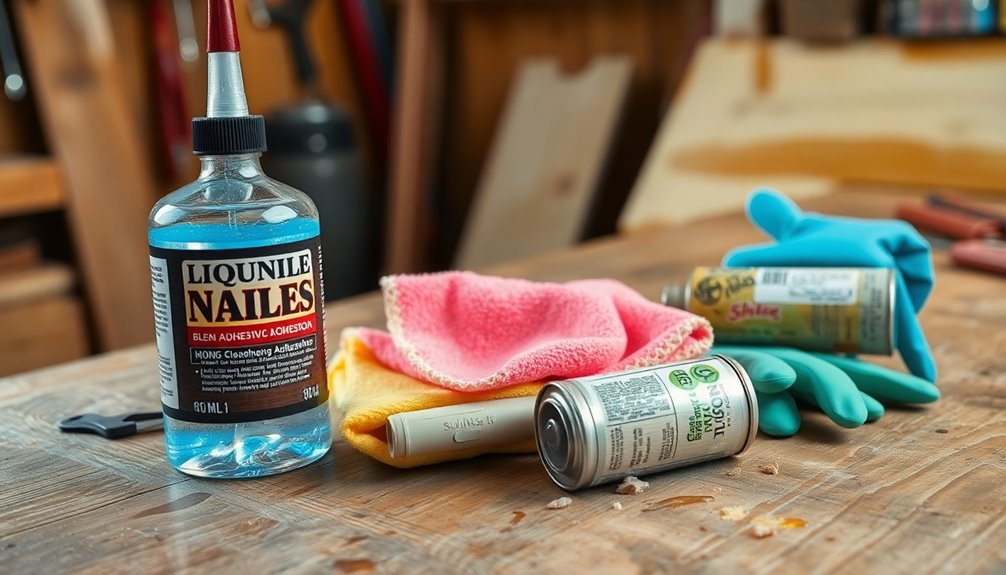
First, if you've spilled any Liquid Nails on your skin or tools, use mineral spirits immediately to remove Liquid Nails before it hardens.
If you need to take a break, wrap the nozzle of the adhesive tube in a plastic bag or rag to prevent the adhesive from drying inside.
Clean any surfaces that touched Liquid Nails right away to avoid permanent bonding; you may need a solvent for cured adhesive.
When trying to remove cured adhesive, avoid using excessive force to prevent damaging the materials.
Finally, dispose of any unused Liquid Nails according to local regulations to guarantee environmental safety. Maintaining a clean workspace can also support a healthier lifestyle by reducing the risk of accidents and ensuring a more organized environment.
Troubleshooting Common Issues

Have you ever faced issues while using Liquid Nails? It can be frustrating, but troubleshooting these common problems is easier than you think. Here's a quick guide to help you out:
| Issue | Solution |
|---|---|
| Poor Bonding | Clean surfaces; remove oil, grease, and dust. |
| Prolonged Drying Time | Check temperature and humidity; allow more time. |
| Sagging or Dripping | Use shorter beads; maintain consistent pressure. |
| Repositioning Difficulties | Adjust within 20 minutes for temporary hold. |
| Stressful Applications | Combine Liquid Nails with nails for stability. |
Additionally, ensure that the surfaces are clean and dry as this will greatly affect the adhesive performance.
Explore Related Products and Their Uses

When tackling heavy-duty applications, you'll want to contemplate Liquid Nails Heavy Duty for its strong bond on metal and wood.
If you're working with glass or plastic, Liquid Nails Clear provides a transparent solution that won't compromise aesthetics.
For quick projects, Liquid Nails Fast Grab offers immediate holding power, making your tasks even easier. Additionally, using strong bonds can significantly enhance the durability of your projects, ensuring they last over time.
Heavy Duty Applications
While tackling heavy-duty applications, Liquid Nails Heavy Duty stands out as the go-to adhesive for projects requiring a reliable and robust bond.
This construction adhesive excels in tough jobs, effectively adhering materials like metal and wood. It's perfect for attaching heavy items, such as:
- Cabinets and fixtures
- Heavy-duty shelving
- Large decorative elements
- Outdoor furniture
For outdoor projects, consider Liquid Nails Exterior for its impressive resistance to heat, water, and UV exposure.
If you need immediate adhesion, Liquid Nails Fast Grab offers strong holding power for vertical applications.
Always verify surfaces are clean, apply a generous amount, and you'll have the flexibility to make adjustments within the first 20 minutes for ideal adhesion. Understanding the importance of proper installation can greatly enhance the effectiveness of your adhesive projects.
Clear Adhesive Benefits
Liquid Nails Clear offers several advantages for your bonding projects, making it an essential addition to your toolkit.
This adhesive provides a transparent bond, perfect for surfaces like glass and plastic, ensuring no visible adhesive lines disrupt your aesthetic. Its water-resistant formula means you can use it both indoors and outdoors, promising durability in any environment.
Once dry, the clear formula becomes paintable, allowing for seamless integration into your projects. You'll appreciate the quick drying time, which offers a strong initial hold while it fully cures for a robust bond.
Plus, a tube of Liquid Nails Clear is compatible with various materials, including timber, ceramics, and metals, making it versatile for all your bonding needs.
Fast Grab Features
Fast Grab features a high-strength adhesive that bonds surfaces immediately, making it a go-to choice for quick projects.
This Liquid Nails Fast Grab product is perfect for those heavy-duty tasks where time is of the essence. Its low odor and water-based formula make it suitable for indoor use without compromising on strength.
Here are some key benefits:
- Provides strong initial holding power
- Allows minor repositioning for up to 15 minutes
- Ideal for trim, molding, and flooring installations
- Paintable once cured for a seamless finish
With Liquid Nails Fast Grab, you can tackle various materials including wood, metal, and ceramics, ensuring your projects are both efficient and durable.
Don't hesitate to make it your go-to adhesive!
Frequently Asked Questions
How Do You Apply Liquid Nails?
To apply Liquid Nails, start by cutting the nozzle tip to your desired flow size.
Load the tube into a caulking gun if you have one, then apply the adhesive in a zigzag pattern with about 4 inches between each line.
Firmly press the surfaces together, using nails, screws, or clamps to hold them in place.
Clean any excess with mineral spirits before it dries, and let it cure for at least 24 hours.
How Long Does It Take for Liquid Nails to Harden?
It typically takes about 30 minutes for Liquid Nails to reach a significant hold, but full curing can take up to 7 days.
You'll want to keep in mind that environmental factors like temperature and humidity can influence these times.
For best results, give it at least 24 hours before removing any temporary fasteners.
Patience is key here, as the adhesive will continue to strengthen throughout the curing period.
Do Liquid Nails Need to Be Clamped?
So, you think you can just slap some Liquid Nails on and walk away? Think again!
Clamping is essential. It's like giving your project a big, warm hug while the adhesive works its magic. Without clamps, your materials might just decide to take a little dance instead of bonding properly.
For the best results, you've got to clamp those surfaces tightly together for at least 24 hours. Trust me, your project will thank you!
Do You Need a Caulking Gun for Liquid Nails?
You don't necessarily need a caulking gun for Liquid Nails, but it's highly recommended.
Using one gives you better control and allows for an even application, which helps guarantee strong bonding. If you squeeze the tube manually, you might end up with a messy job and less precision.
For the best results, especially with specific products like Fuze*It, a caulking gun makes the process much easier and more effective.
Conclusion
Now that you know how to use Liquid Nails effectively, you're ready to tackle your projects with confidence. Remember, the right prep and application can make all the difference, so don't cut corners. If you hit a snag, troubleshoot and adjust as needed. With a little patience, you'll bond materials like a pro. So, roll up your sleeves and get to work—after all, practice makes perfect!