To do dip nails at home, start by gathering your supplies like a dip powder kit and acetone. Prepare your workspace by cleaning the area and removing old dip powder. Shape and smooth your nails, then apply a primer and a base coat. Next, dip your nails into the color powder at an angle. Afterward, smooth the surface and apply top coats, allowing them to dry. Want to learn more tips and tricks for perfecting your dip nails?
Key Takeaways
- Gather all necessary supplies, including a dip powder kit, nail file, acetone, and cotton balls for an organized workspace.
- Remove old dip powder nails by filing, soaking in acetone, and gently scrubbing away remaining powder.
- Prepare nails by smoothing, shaping, and applying a primer and base coat before dipping into color powder at a 30-45 degree angle.
- Smooth the top layer of dip powder with sanding blocks before applying two quick coats of top coat, allowing for proper drying.
- Remove dip nails by filing, soaking in acetone, and gently pushing off softened product, ensuring to wash hands afterward.
Supplies
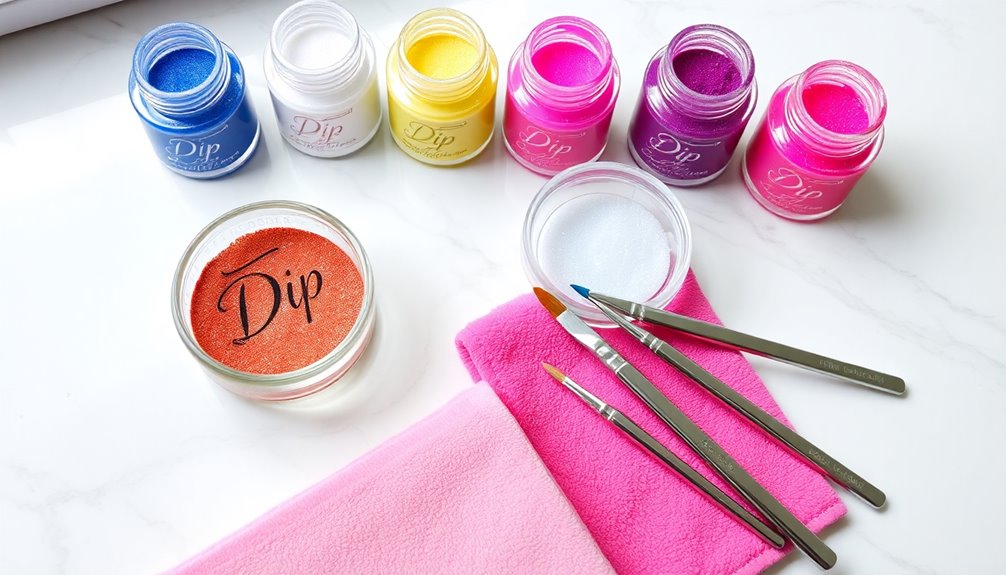
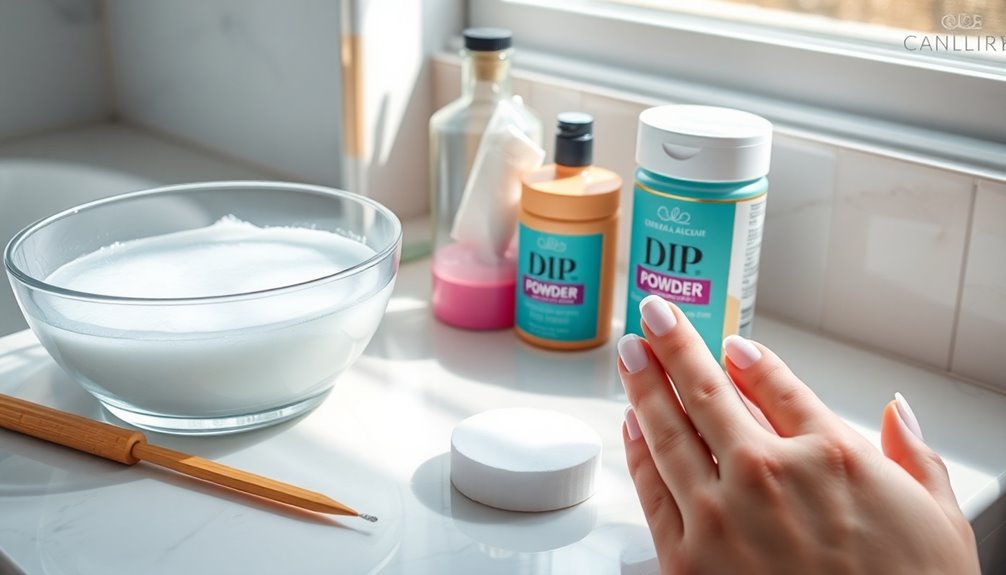
To achieve beautiful dip nails at home, you'll need to gather some essential supplies. Start with a dip powder kit, which includes a base coat, activator, top coat, and color powder. These components are vital for the dip application process.
You'll also need a nail file to shape and smooth your nails before you begin. Don't forget acetone for removing any old dip powder nails; using aluminum foil with acetone-soaked cotton balls makes this easier.
For best results, consider a drill or rotary tool for sanding the nail surface at a constant speed of 300-400rpm. Finally, optional items like sanding blocks and a ceramic bowl for acetone soaking can enhance your experience. Additionally, ensuring proper filter maintenance can prevent dust accumulation in your workspace.
Happy dipping!
Step 1: Prepare Your Workspace

To kick off your dip nails process, start by organizing your supplies and protecting your workspace.
Cover your surface with aluminum foil and lay down an old towel to soak up any spills.
This setup not only keeps things tidy but also guarantees you work safely and efficiently. Additionally, consider cleaning your workspace with a damp cloth to ensure a clean environment before you start your nail application.
Organizing Your Supplies
Setting up your workspace is essential for a smooth dip nails experience at home. Organizing your supplies effectively will help you prep your nails and minimize interruptions during the application.
Here's a quick list of what you'll need:
- Aluminum foil – to protect your table from acetone spills.
- Old towel – for absorption and cleanliness.
- Dip Powder Kit – keep it within arm's reach.
- Manicure kit – gather all tools you need for nail prep.
Once you've laid out your protective surface and gathered your nail polish and supplies, you'll create a streamlined setup that allows you to focus on your dip nails project without any hassle. Additionally, many celebrities often share their nail care routines on social media, providing inspiration for your at-home manicure.
Happy dipping!
Setting Up Safely
Before you immerse yourself in your dip nails project, preparing your workspace safely is essential to avoid any mishaps.
Start by laying down aluminum foil to protect your table from acetone spills, then place an old towel on top for extra absorption.
Keep your setup organized by ensuring all supplies, like acetone, cotton balls, and a cuticle pusher, are within easy reach.
Secure your drill in a vice, making sure it's clamped properly but not too tight to avoid accidents.
Use zip-ties to engage the drill trigger for consistent operation while sanding your nails.
Finally, adjust the drill speed to a controlled 300-400rpm for ideal sanding performance, protecting your nail surface from damage. Additionally, ensure that you are aware of the power requirements for any electrical appliances you might be using during the process.
Step 2: Remove the Old Dip Powder Nails
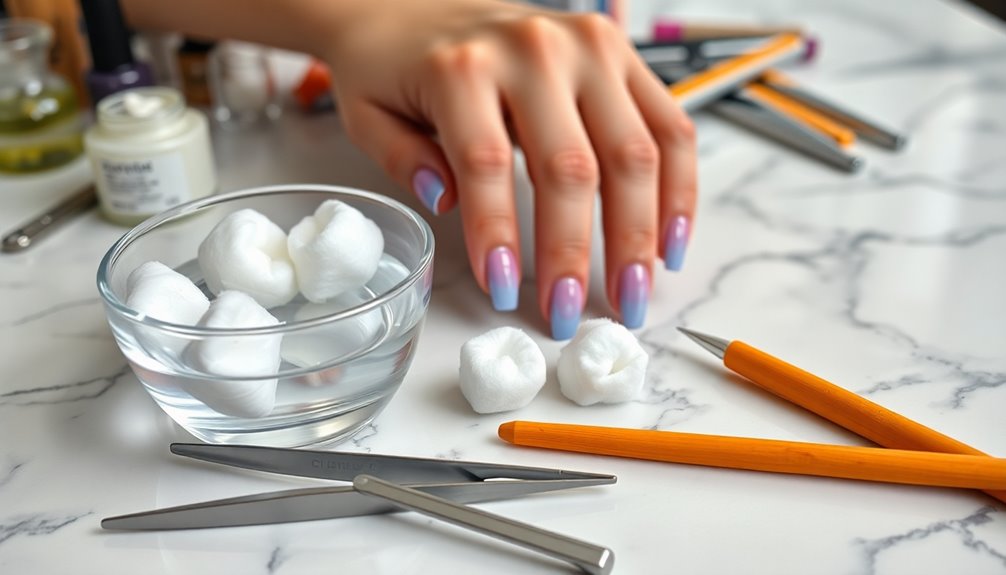
Removing old dip powder nails is essential for a fresh application, and you can do it efficiently with the right steps.
Follow these simple guidelines to remove dip nails effectively:
- Use a gentle nail file to mechanically remove as much dip powder as you can.
- Cut squares of aluminum foil and soak cotton balls in acetone.
- Wrap each nail with the soaked cotton and aluminum foil, letting it sit for 5-10 minutes.
- Afterward, use a paper towel soaked in acetone to gently scrub away any remaining powder. Additionally, ensuring that your nails are healthy and well-maintained can enhance color accuracy in your nail designs.
Step 3: Finish Preparing Your Nails
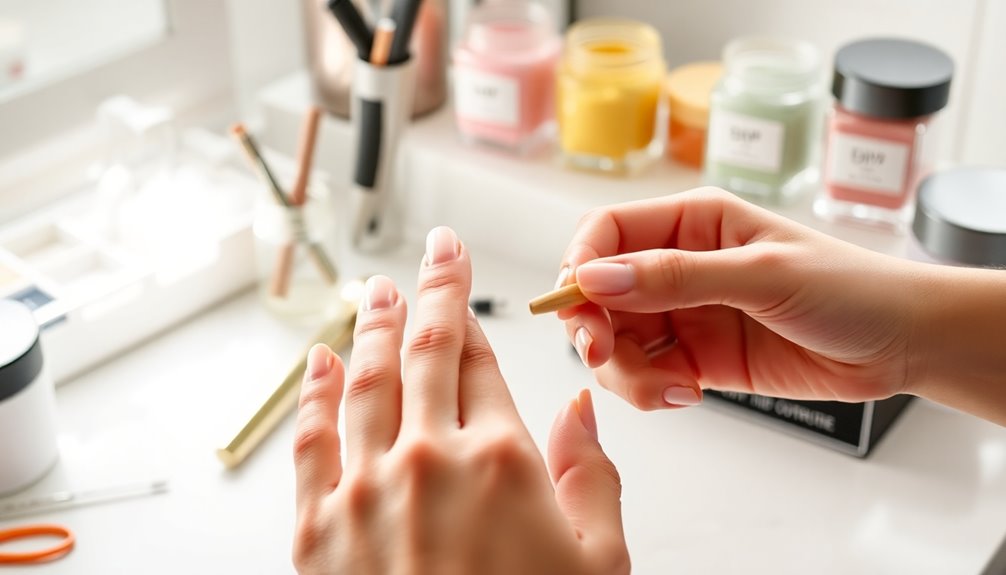
Now that you've removed the old dip powder, it's time to smooth and shape your nails for the new application.
Use a rotary tool or sanding blocks to guarantee a clean surface, and don't forget to trim and file your nails to your preferred length and style. This step is essential for achieving a flawless finish with your dip nails, as proper piercing care and hygiene can help prevent any potential irritation or infection during the process.
Nail Surface Smoothing Techniques
To achieve a flawless dip nail application, your nail surface needs proper smoothing. Follow these steps to guarantee a perfect foundation for your dip powder:
- Use a rotary tool with a sanding bit to gently smooth away any remaining color and create an even surface.
- Grab a 180-grit sanding block to refine the nail surface, focusing on rough spots or imperfections.
- Switch to a 320-grit sanding block for a finer finish, making sure your nails feel smooth to the touch.
- Thoroughly wash and dry your hands to remove dust and debris before moving on to the priming process. Additionally, ensuring that your nails are free from excessive consumption of any irritants will help in achieving better results.
With a well-prepared nail surface, you're ready to plunge into the exciting world of dip nails!
Nail Trimming and Shaping
Achieving the perfect dip nails starts with nail trimming and shaping, which sets the foundation for a polished look.
Begin by using a nail clipper to trim your nails to your desired length, ensuring they're even across all fingers. Next, choose a shape that suits your hand—square, oval, or almond—and file your nails in one direction to prevent splitting, achieving a smooth finish on the tips.
Don't forget the cuticle area; gently push back your cuticles with a cuticle pusher to create a clean nail bed for better adhesion.
Finally, wash and dry your hands thoroughly to remove any dust or debris. This step is crucial for ensuring proper adhesion for dip powder application. Now you're ready to move on to the dip powder application!
Step 4: Prime and Apply Dipping Powder Color
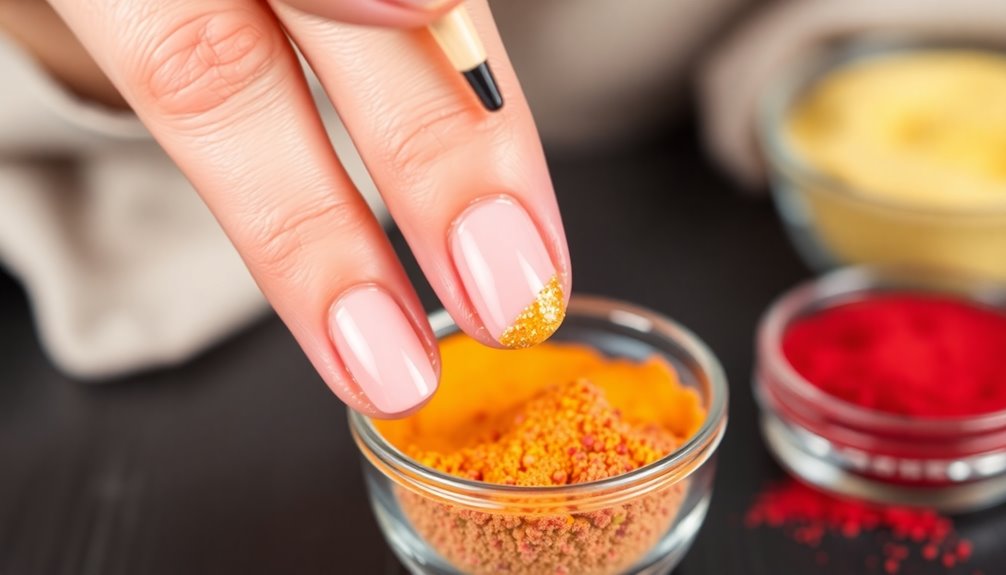
Priming and applying the dipping powder color is essential for a flawless finish. Follow these steps for best results:
- Start with a thin layer of primer on each nail, conditioning them for the next steps.
- Apply a base coat evenly, avoiding your cuticles for ideal adhesion.
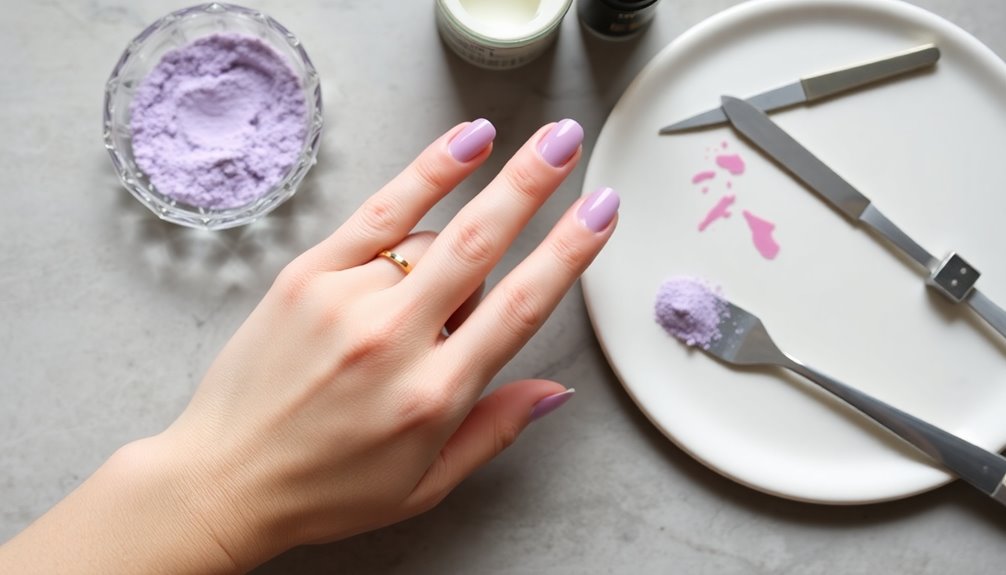
- Dip your nail at a 30-45 degree angle into the color powder, covering about 2/3 of the nail, then tap off the excess.
- For the second coat, apply the base coat to half the nail towards the cuticle, ensuring a thicker layer before dipping again.
Finally, finish with one more base coat and dip again for even color coverage. This technique will help you achieve beautiful dip nails at home! Additionally, using a quality base coat can contribute to healthier hair and overall nail quality during the dipping process.
Step 5: Smooth Out Your Nail Dipping Powder
Once you've applied the dipping powder color, smoothing out your nails is essential for a polished finish.
Start by using a drum sander with a 180-grit sanding block to gently smooth the top layer of the dip powder. This helps remove any imperfections, ensuring an even surface across all your nails.
Follow up with a 320-grit block for a finer finish, using a circular motion while sanding to eliminate any voids. This process is vital as it prepares your nails for the final application of the top coat.
After sanding, apply a final layer of applicator to capture any sanding dust, creating a smooth base for the top coat—setting you up for a beautiful finishing touch. Additionally, regular maintenance of your nail tools can prevent potential mechanical failure and ensure optimal performance during your nail dipping process.
Step 6: Top Coat and Final Shaping

As you prepare to apply the top coat, remember that this step is essential for achieving a long-lasting, glossy finish on your dip nails.
Follow these key tips for the best results:
- Apply two coats of top coat quickly for even coverage, as the brush quality may limit usability.
- Let each top coat application dry for 10-15 minutes without touching to guarantee a smooth finish.
- Use a nail board for final shaping, focusing on the edges and any uneven areas to create a polished look.
- Avoid contact with the cuticles while applying the top coat to prevent lifting.
After applying the top coat, consider using cuticle oil to nourish and moisturize the nail area for added shine and health.
How to Remove Dip Nails at Home
Removing dip nails at home can be a straightforward process if you follow the right steps.
Start by gently filing the top layer of the dip powder with a coarse nail file. This breaks the seal and helps the acetone penetrate better.
Next, soak cotton balls in acetone and wrap them around each nail using aluminum foil to keep the moisture in. Let your nails soak for about 10-15 minutes.
After soaking, check if the dip powder has softened. If it has, gently push the product off with a wooden cuticle stick.
For any remaining dip powder, reapply the acetone-soaked cotton balls and let them sit for another 5-10 minutes.
Finally, wash your hands and apply moisturizing cuticle oil.
Why Should I Do Dip Nails at Home?
After mastering the removal of dip nails at home, you might wonder why you should consider applying them yourself.
Here are a few reasons to give DIY dip powder nails a shot:
- Cost-effective: A Starter Kit under $50 provides multiple applications, saving you from salon prices of $35-$50 per visit.
- Time-efficient: Complete the process in just one to two hours, allowing you to watch TV or multitask while getting your nails done.
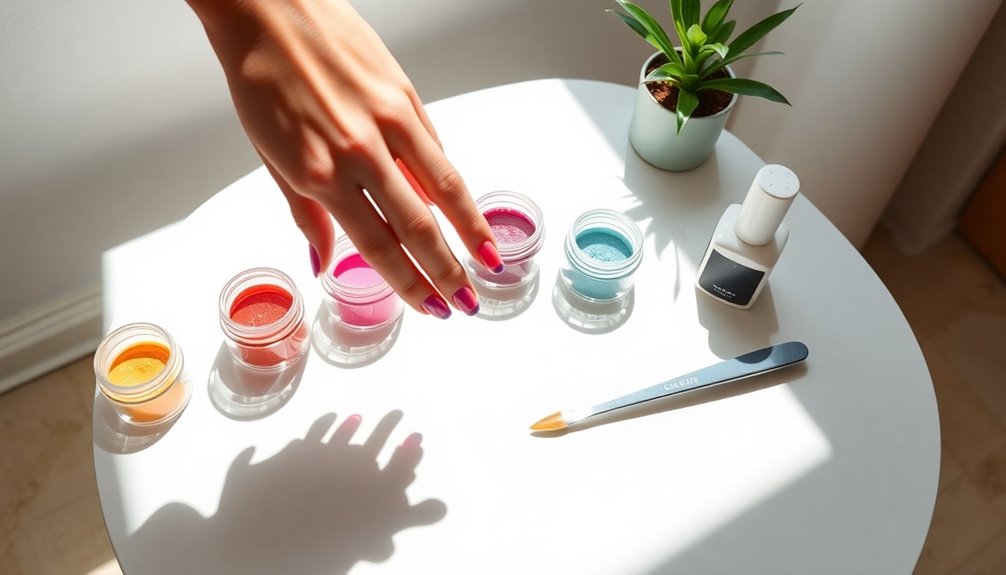
- Customization: Enjoy the freedom to choose your colors and styles, making your entire nail experience personal.
- Durability: Dip nails last at least two weeks without chipping, meaning you can enjoy beautiful nails with less frequent maintenance.
Frequently Asked Questions
How to Do Dip Nails at Home Step by Step?
To tackle dip nails at home, start by prepping your workspace with protective materials and gather your supplies.
Remove any old dip powder by sanding and soaking your nails in acetone.
Apply a primer, followed by a base coat, and dip each nail into your chosen color powder.
Smooth the surface with a drum sander, then add two coats of top coat for a glossy finish, allowing time to dry between applications.
How to Use Dipping Powder for Beginners?
If you're starting with dipping powder, first prep your nails by pushing back cuticles and buffing the surface.
Apply a primer, then a thin base coat.
Dip each nail at a 45-degree angle into your chosen color powder, layering for desired coverage.
After dipping, use an activator to harden the nails and let it dry.
Finally, file and shape before sealing it all with a top coat for a glossy finish.
Can You Do Dip Nails on Yourself?
Yes, you can definitely do dip nails on yourself!
With the right supplies, like a dip powder kit and acetone, you'll find it's quite manageable. Many beginners achieve salon-quality results with practice.
Just remember, proper nail preparation is key—push back your cuticles and guarantee your nail plate has a rough texture for better adhesion.
Following the right steps will help you create a durable and polished finish in just a couple of hours.
Do You Need an UV Lamp for Dip Powder Nails?
Imagine painting a canvas without needing to wait for it to dry under a spotlight. That's how dip powder nails work—no UV lamp needed!
Instead, you apply a base coat, dip your nails in colored powder, and use an activator to harden it all. This method not only saves time but also keeps your nails healthier, reducing exposure to UV rays.
Conclusion
Now that you've mastered the art of dip nails at home, imagine the satisfaction of flaunting your perfectly polished fingertips, shimmering like a freshly painted canvas. With each stroke, you've transformed your nails into a stunning accessory, reflecting your unique style. Embrace this creative ritual, where each dip not only beautifies but also empowers you. So, gather your supplies, release your inner artist, and let your nails tell the story of your vibrant personality.