Doing gel nails at home can save you both time and money. First, gather essential tools like a reliable UV or LED lamp, gel polishes, and a good base and top coat. Prepare your nails by cleaning, buffing, and pushing back cuticles. Apply thin layers of gel polish, curing each under the lamp. Finish with a top coat and wipe off any tackiness. With proper care, your gel manicure can last. Stick around to discover more tips and tricks!
Key Takeaways
- Gather essential tools like an LED/UV lamp, gel base and top coats, glass nail file, and lint-free wipes for a successful application.
- Prepare your nails by cleaning, pushing back cuticles, and lightly buffing the surface for better polish adhesion.
- Apply a thin layer of gel polish, curing each coat under the lamp as per instructions, and repeat for a second coat if desired.
- Finish with a top coat to seal and add shine, then cure again and wipe off any tackiness with alcohol.
- Maintain your gel nails by regularly using cuticle oil and monitoring for any signs of lifting or damage.

Isner Mile Dad Gifts Fathers Day Husband: from Wife Daughter, Beard Grooming Kit for Men with Beard Oil Balm Wash Brush Comb & Straight Razor, Stocking Stuffers Birthday Gifts for Men Him Boyfriend
COMMAND ATTENTION WHEREVER YOU GO - A groomed beard will make you stand out from the crowd! The...
As an affiliate, we earn on qualifying purchases.
Benefits of Doing Gel Nails at Home

When you choose to do gel nails at home, you not only save money but also gain flexibility and creativity. This cost-effective option can save you between $600 and $840 annually compared to salon visits.
You'll enjoy time efficiency by skipping travel and wait times. Plus, doing gel nails at home lets you experiment with unique designs and color combinations, showcasing your creativity in ways salons mightn't accommodate.
The longevity of gel polish means one set of quality products can provide 20-30 manicures, maximizing your investment value. Additionally, having the right appliances included in your home can enhance your nail care experience, making the process even more enjoyable.
Most importantly, the process can be a relaxing experience, combining personal care with leisure, like watching your favorite shows.
Embrace the benefits and elevate your nail care routine!

Janhavi Personalized Toiletry Bag for Men, Gifts for Boyfriend, Toiletry Bag For Shower Caddy,Personalized Initials & Wheat, Mens Toiletry Travel Bag Travel Essentials Men(Medium, Yellow Brown, J)
Handcrafted Engraved Initials & Wheat: Janhavi premium PU leather toiletry bag for men has different initial that are...
As an affiliate, we earn on qualifying purchases.
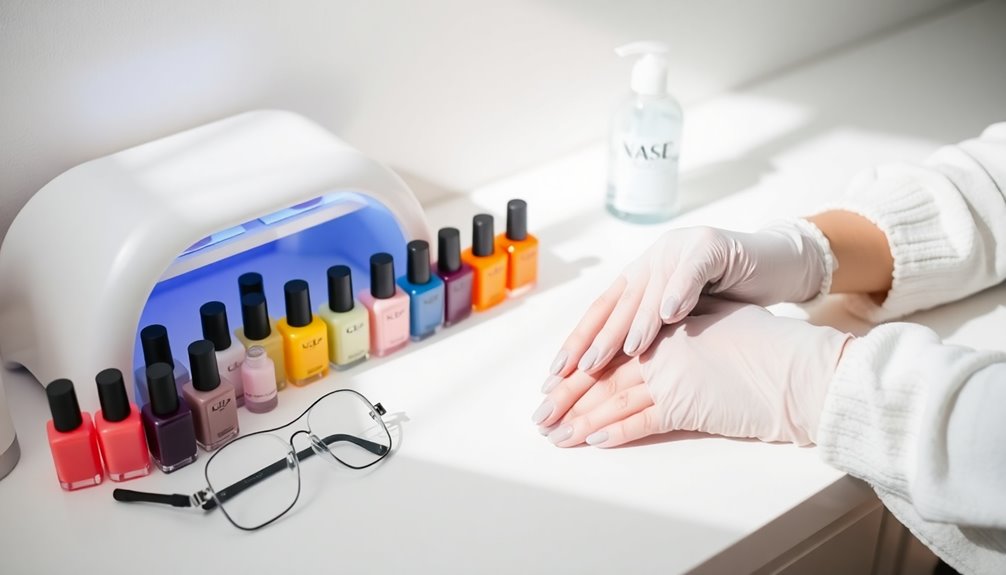
Essential Tools and Products for At-Home Gel Nails

To achieve stunning gel nails at home, you'll need a few essential tools and quality products.
Start with a reliable LED or UV lamp, a glass nail file, and the right gel polishes from trustworthy brands.
Don't forget about safety considerations, like using cuticle remover and alcohol for a clean application. Additionally, consider using essential oils for nail care to promote healthier nails and cuticles during your manicure routine.
Must-Have Tools
Creating beautiful gel nails at home requires the right tools to secure a flawless finish. Start with a high-quality LED or UV lamp for curing your gel polish effectively, curing each layer for 30 to 60 seconds.
You'll need a gel base coat and top coat designed specifically for gel nail applications to guarantee proper adhesion and longevity. A glass or crystal nail file is ideal for shaping and smoothing your nails without damage.
Don't forget lint-free wipes for cleaning and applying rubbing alcohol, as cotton fibers can ruin your polish. A nail buffer and cuticle pusher help prep your nails, while cuticle oil nourishes your nails post-application, promoting health and flexibility. Additionally, ensure regular filter replacement of your air purifier to maintain a clean environment while you work on your nails.
Recommended Gel Products
Achieving salon-quality gel nails at home starts with selecting the right products. Invest in a high-quality LED or UV lamp; it's essential for curing gel polish effectively.
Choose a reputable gel polish brand like OPI gel, known for its longevity and chip resistance. Always use a gel base coat and top coat to enhance durability and shine.
Apply thin coats of color polish for the best results, curing each layer for 30 to 60 seconds. Keep lint-free wipes and isopropyl alcohol handy to clean nails and remove any sticky residue post-curing.
Don't forget to use a quality cuticle remover before starting and apply cuticle oil afterward to maintain nail health, contributing to a stunning gel manicure at home. Additionally, ensure your nails are clean, dry skin before applying gel polish for optimal adhesion and longevity.
Safety Considerations
While you're excited to try gel nails at home, it's important to prioritize safety by using the right tools and products. Always work in a well-ventilated area to minimize inhaling harmful fumes. Choose high-quality gel polishes from reputable brands like OPI or Dazzle Dry to protect your nail health. Don't forget to wear UV gloves during curing to prevent UV exposure to your skin, especially with frequent use. After each session, disinfect your tools with rubbing alcohol to prevent the spread of bacteria. Finally, make sure your workspace is distraction-free to maintain focus and safety throughout the process. Additionally, be aware of the ethical implications of using certain products that may contain harmful chemicals.
| Safety Consideration | Action Needed |
|---|---|
| Ventilation | Work in a well-ventilated area |
| Product Quality | Use high-quality gel polishes |
| Skin Protection | Wear UV gloves |
| Tool Hygiene | Disinfect tools with rubbing alcohol |
| Focus | Keep workspace distraction-free |

FAMILIFE Gifts for Men, Manicure Set Clippers Manicure Kit Nail Clipper Sets 16pcs Mens Grooming Kits Professional Stainless Steel Nail Kit Brown Leather Case Travel Kits
【HIGH QUALITY MANICURE SET PROFESSIONAL】 - Made of high quality carbon steel, Familife stainless steel manicure set are...
As an affiliate, we earn on qualifying purchases.
Steps to Prepare for Gel Nail Application

Before diving into the gel nail application, it's essential to prepare your nails properly. Start by cutting your nails to your desired length for a clean canvas.
Next, shape your nails with a file to achieve your preferred style. Remember to gently push back your cuticles using a cuticle pusher, exposing the nail plate for better adhesion.
Follow these steps for a flawless prep:
- Cut your nails for uniformity
- File to your desired shape
- Push back cuticles carefully
- Clean nails with isopropyl alcohol
- Confirm nails are dry before applying the base coat
Additionally, ensuring that your nails are clean and dry will help in achieving better adhesion for the gel polish. With your nails prepped, you're ready to get those gel nails done!

Personalized Leather Toiletry Bag for Men – Custom Shaving Dopp Kit with Name or Initial, Travel Gift for Groomsmen, Husband, Dad, Boyfriend, Birthday, Anniversary, Valentines Day Gifts for Men, Him
Personalized Leather Toiletry Bag: Crafted from genuine leather, this customized toiletry bag features 12 elegant engraving styles for...
As an affiliate, we earn on qualifying purchases.
Application Process for Gel Nails

Now that your nails are perfectly prepped, you can immerse yourself in the application process for gel nails.
Start by applying a thin layer of gel base coat, making sure it doesn't touch your skin or cuticles. Cure it under an LED or UV lamp for 30 to 60 seconds.
Next, apply the gel color polish in thin layers, curing each layer for the same duration; two to three coats usually provide the best coverage.
Once you're happy with the color, finish with a gel top coat, sealing the free edge. Cure it again for another 30 to 60 seconds.
Finally, wipe your nails with rubbing alcohol to remove any sticky residue, leaving a smooth and shiny finish. Additionally, to maintain a healthy nail appearance, ensure you are drinking adequate water daily to keep your nails hydrated.
Safety Precautions
As you enjoy your gel nail application, it's important to take into account safety precautions to protect yourself and confirm a successful manicure.
Start by working in a well-ventilated area to minimize inhalation of fumes. Always wear UV gloves during the curing process to shield your skin from harmful UV rays.
Here are some essential safety tips:
- Avoid contact with skin and eyes; rinse immediately if any gel polish or remover touches them.
- Clean all tools and surfaces with rubbing alcohol to prevent the spread of bacteria.
- Choose high-quality, non-toxic gel polish products free from harmful chemicals.
- Confirm a hygienic application by keeping your workspace organized and clean.
- Regularly clean tools and surfaces to ensure a safe application and minimize the risk of infection.
Following these steps will help confirm a safe and enjoyable gel nail experience!
Tips for Long-Lasting Gel Manicure

To achieve a long-lasting gel manicure, focus on the application technique from the very beginning.
Start by using a high-quality base coat—apply a thin layer and cure it properly. Next, apply your gel color in thin layers, curing each layer to guarantee strong adhesion.
Don't forget to seal the free edge with both the base coat and top coat to prevent chipping and lifting. After curing the top coat, wipe away any sticky residue with rubbing alcohol for a smooth finish.
Finally, regularly apply cuticle oil to keep your nails hydrated and flexible, which will help extend the life of your gel nails. Additionally, ensure you are using high-quality products to prevent any potential issues similar to those caused by a clicking ceiling fan, which can lead to mechanical failures.
Follow this step-by-step guide, and you'll enjoy a long-lasting manicure!
Frequently Asked Questions
How to Do Gel Nails at Home Step by Step?
To do gel nails at home, you need to gather all your materials first.
Clean and prep your nails by trimming and buffing them.
Next, apply a thin layer of gel base coat, curing it under a lamp.
After that, add your gel color polish in thin layers, curing each one.
Finish with a top coat and cure it again.
Wipe off any sticky residue with isopropyl alcohol for a glossy finish.
Do You Need an UV Lamp for Gel Nails?
Yes, you need a UV or LED lamp for gel nails.
These lamps cure the gel polish, allowing it to harden and adhere properly to your nails. If you skip the lamp, the polish won't set, leading to smudging or peeling.
UV lamps take a bit longer, while LED lamps cure much faster.
Always check your gel polish brand's recommendations to guarantee compatibility with the lamp you choose for the best results.
What Equipment Is Needed to Do Gel Nails at Home?
To do gel nails at home, you need a few essential tools.
First, grab a UV or LED lamp for curing your gel polish. You'll also want a nail file, a nail buffer, and a lint-free wipe to prep your nails.
A quality gel base coat and top coat are vital for durability, along with your chosen gel color polish.
Don't forget acetone and cotton pads for removal, plus cuticle oil for aftercare!
How to Do Gel Nails With UV Light at Home?
Imagine your nails are like a canvas, waiting for a masterpiece.
To do gel nails with UV light, start by cleaning and shaping your nails. Apply a thin base coat and cure it under the UV lamp for about 30-60 seconds.
Choose your gel color, applying thin layers and curing each one. Finish with a glossy top coat, curing it again.
Finally, wipe off any sticky residue and pamper your cuticles with oil.
Conclusion
So, you've mastered the art of gel nails at home, and now you're practically a professional, right? Who knew that saving a trip to the salon could lead to you transforming your living room into a nail studio? Just remember, while you're enjoying your stunning nails, don't be surprised if your friends start asking for appointments. After all, nothing says "I've got it all together" like perfectly polished nails—made right from your couch!