To make fake nails, start by choosing strong, waterproof materials like straws or plastic sheets. Cut them into your desired shape using sharp scissors, then smooth the edges with a fine-grit nail file. Apply a base coat to help the polish adhere, then paint your nails with thin layers of acrylic or nail polish. Allow them to dry completely, and feel free to customize with designs or embellishments. There's more to learn about finishing touches and maintenance.
Key Takeaways
- Select strong, waterproof materials like straws or acrylic sheets, and ensure adhesive compatibility with natural nails to prevent damage.
- Cut and shape the nails using sharp scissors, a cutting mat, and a fine-grit nail file for smooth edges and a polished finish.
- Apply a thin layer of base coat up to the cuticle for better adhesion, followed by thin layers of nail polish, allowing each to dry completely.
- Customize the nails with unique designs using nail art techniques, embellishments, and a top coat for shine and protection against chipping.
- Allow nails to dry thoroughly in a cool, dry area and avoid touching them to prevent smudging or damage.
Choosing the Right Materials

When you're ready to make fake nails, selecting the right materials is essential for achieving a great look and ensuring durability.
Start by considering items like straws, which can be cut into nail shapes and offer strength and waterproof properties. For a glossy finish, opt for acrylic paint or nail polish, allowing you to customize colors easily.
Make sure the adhesive you choose, such as nail glue or strong craft glue, is compatible with both your nail material and natural nails to avoid damage. If you want a more durable option, plastic or acrylic sheets can provide a sturdier base. Additionally, be mindful of sodium content in adhesive products, as some may contain ingredients that could irritate the skin or cause allergic reactions.
Always test materials on a small area first to check for allergic reactions or skin irritations.
Cutting the Nail Shapes

When cutting your fake nails, choosing the right shape is essential for achieving a natural look.
You'll need sharp scissors for precision cutting, so make certain you have the right tools on hand.
Keep in mind some tips for precision cutting to guarantee your nails fit perfectly and look polished. Additionally, maintaining a clean workspace will help you avoid contaminants affecting air quality that could impact your nail application.
Choosing Nail Shape
Choosing the right nail shape can dramatically enhance the overall look of your fake nails, so it's essential to assess the styles that best suit your aesthetic. Here are some popular nail shapes to take into account:
| Nail Shape | Description | Ideal For |
|---|---|---|
| Almond | Tapered sides with a rounded tip | Chic appearance |
| Square | Straight sides, flat tip | Bold, modern look |
| Stiletto | Sharp, pointed tip | Dramatic flair |
| Coffin | Wide base, flat tip | Trendy nail art |
| Oval | Rounded edges, elongated look | Soft elegance |
Deciding on the shape will help you achieve the perfect style for any occasion. Choose wisely, and your fake nails will stand out beautifully! Additionally, consider how certain nail shapes can complement your chic appearance when choosing your fake nails.
Tools Needed for Cutting
To achieve the perfect nail shape, you'll need the right tools for cutting your fake nails. Sharp scissors or a craft knife are essential for cutting through materials like straws or plastic, providing clean edges and precision.
A nail template or stencil will help you maintain consistent shapes and sizes, ensuring a uniform look across all your nails. For intricate designs, nail clippers can refine the shape and trim corners after your initial cuts.
Don't forget to place a cutting mat beneath your material; it protects surfaces and offers stability while you work. Finally, keep safety in mind: always keep your fingers clear of the cutting path and use tools designed for precision to avoid injury. Additionally, using a nail template can enhance your overall nail design, much like how astrological compatibility may enhance interpersonal attraction.
Tips for Precision Cutting
Now that you've gathered the right tools for cutting, it's time to focus on precision cutting techniques to shape your fake nails. Start by using a sharp pair of scissors or a craft knife for clean edges. Measure and mark your desired nail length on the straw with a pencil to guarantee consistency. Cut at a slight angle towards the tip to mimic a natural nail shape. Practice on a scrap piece first to perfect your technique. After cutting, gently file the edges with a fine-grit nail file to smooth any rough areas. Remember, just as in home cinema projectors, precision in color accuracy can significantly enhance the overall appearance of your finished fake nails.
| Step | Action | Purpose |
|---|---|---|
| Measure | Use a pencil to mark length | Consistency |
| Cut | Angle cut towards the tip | Natural look |
| Practice | Test on scrap straw | Improve technique |
| File | Smooth edges with fine-grit file | Enhance appearance |
Smoothing the Edges

Smoothing the edges of your fake nails is essential for a polished look and to prevent any snags. You'll need a fine-grit nail file and a buffer to perfect the finish. Additionally, using color theory can enhance the emotional impact of your nail art design.
Importance of Smooth Edges
When you apply fake nails, ensuring the edges are smooth is essential for both comfort and aesthetics. Rough edges can snag on clothing or hair, causing irritation and discomfort. This not only makes wearing them unpleasant but can also lead to painful hangnails or damage around your nail bed.
Smoothing the edges gives your nails a polished, professional look, making them blend seamlessly with your natural nails. Plus, properly smoothed edges can improve the durability and longevity of your fake nails, reducing the risk of chipping or lifting. Additionally, just as with high-quality protein sources, smooth edges contribute to overall nail health and enhance the appearance of your manicure.
Tools for Smoothing Nails
Achieving smooth edges is just the beginning of creating beautiful fake nails; the right tools make all the difference.
Start with a fine-grit nail file, around 180 to 240 grit, to gently smooth the edges for a polished finish. A buffing block is essential for refining the surface, eliminating rough spots, and enhancing shine.
Consider using a glass nail file, which offers a smoother finish and minimizes the risk of splitting or damaging the nails. For quicker results, a sanding band attached to a nail drill can effectively shape and smooth edges.
Remember to file in one direction to prevent fraying and guarantee clean edges. With these tools, you'll achieve the flawless look you desire for your fake nails! Additionally, ensuring that your nails are well-maintained with regular routine health checks can prevent potential issues during the nail application process.
Techniques for Edge Finishing
To create a polished finish on your fake nails, focus on refining the edges with the right techniques.
Start by using a fine-grit nail file to gently smooth the edges. This helps achieve a natural appearance without chipping or cracking.
For a more precise finish, use a buffer block after filing to blend the edges seamlessly with your natural nails.
Don't forget to round off the corners slightly to avoid sharp edges that can snag or cause discomfort.
Once you're satisfied with the shape, apply a top coat. This enhances shine and adds an extra layer of protection against chipping.
Finally, remember to regularly clean your tools to maintain the quality of your edge finishing. Additionally, ensuring that your piercings are properly cleaned can prevent irritation when you're working with tools around your nails.
Applying the Base Coat

Start by selecting the right base coat for your nails, as this essential step sets the foundation for your manicure. A good base coat creates a smooth surface for polish and helps prevent staining from colored polishes.
When applying, guarantee you cover the entire nail surface evenly, reaching up to the cuticle, which aids in the adhesion of subsequent layers. Remember to apply a thin layer; thick coats can cause bubbling and uneven application.
Allow the base coat to dry completely before moving on to any colored polish, as this enhances the longevity of your manicure. If you have weak or brittle nails, consider a strengthening base coat to provide extra support. Additionally, using a natural hair styling product can help maintain healthy nails, as some of these products are designed to nourish and protect the nail bed.
Painting the Nails

Painting fake nails is a fun way to express your style and creativity. Start by applying a base coat to protect your nails and enhance polish longevity.
Choose nail polish specifically formulated for artificial nails, as it provides better adhesion and a smoother finish. Apply thin, even layers of your chosen color, and make sure each coat dries completely before adding the next for a flawless look.
Once you're satisfied with the color, finish off with a top coat to add shine and protect against chipping.
Don't hesitate to experiment with nail art techniques like dotting or striping to personalize your fake nails. Let your creativity shine through with unique designs that make your nails stand out!
Allowing to Dry

Once you've finished applying the polish and added your top coat, allowing your nails to dry is key to achieving a long-lasting look.
Take the time to let them dry completely for at least 20-30 minutes. To help speed up the process, consider these tips:
- Place your nails in a cool, dry area.
- Use a fan to circulate air around them.
- Avoid touching or moving the nails to prevent smudging.
- If you're using nail glue, wait at least 5-10 minutes before applying any pressure.
You can also opt for a quick-dry top coat, which will cut down your drying time and boost the shine.
With these steps, you'll guarantee your fake nails look fabulous and last!
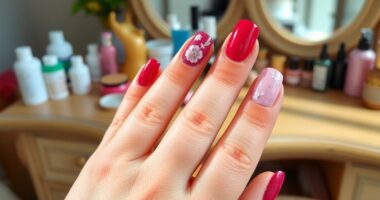
Customizing Your Fake Nails

Customizing your fake nails is a fun way to express your personality and creativity. Start by using nail polish or acrylic paint to create unique designs that reflect your style.
You can add embellishments like rhinestones, glitter, or decals to make your nails stand out even more. Experiment with different finishes, such as matte or glossy top coats, to achieve a professional look.
Nail art tools like dotting pens or brushes can help you create intricate designs and detailed artwork. For a cohesive appearance, consider matching your customized nails with your outfit or accessories.
This way, your fake nails not only look fabulous but also enhance your overall look, showcasing your individuality with every gesture.
Frequently Asked Questions
How Do You Make Your Own Fake Nails?
To make your own fake nails, start by cutting straws into pieces that match your desired nail shape and length.
Once you've shaped them, paint each piece with your favorite nail polish color. For extra durability, apply a clear top coat over the polish.
Finally, use nail glue or adhesive tabs to attach the straws to your natural nails, ensuring a snug fit.
Experiment with different sizes and designs to create a unique look!
How Do You Make Fake Nails With Cornstarch?
You might think creating something beautiful takes fancy materials, but you can actually use cornstarch to make your own nails!
Start by mixing cornstarch with a clear adhesive to form a thick paste. Shape it onto your nails or a plastic form, letting it dry for hours.
Once hardened, file it to your liking. Seal with polish for shine, and get creative with colors or glitter to make them uniquely yours!
What Is a Good Alternative to Nail Glue?
If you're looking for a good alternative to nail glue, consider using double-sided tape.
It's easy to apply and removes cleanly without harming your natural nails. You could also try gel or acrylic top coat as a bonding agent.
For a gentler option, surgical tape or medical adhesive strips work well, too.
If you want something more natural, mix cornstarch and water to create a paste that serves as a temporary adhesive.
How Do You Make Fake Nails Without Acrylics?
To make fake nails without acrylics, you can get creative with everyday materials.
Start by cutting a straw to your desired length and shape, ensuring it fits snugly over your natural nails.
Once shaped, paint the straw with your favorite nail polish for a natural look.
Don't forget to apply a top coat for added durability.
This method's waterproof, making it perfect for daily wear without worrying about damage.
Enjoy your stylish, budget-friendly nails!
Conclusion
Now that you know how to create stunning fake nails, you can release your inner artist and transform your fingertips into a canvas of creativity. With the right materials and a little practice, your nails can shine like stars in the night sky. Don't be afraid to experiment and customize your designs—after all, your nails are a reflection of your unique style. So go ahead, let your imagination run wild and enjoy the beauty of your handiwork!