
You can easily turn kitchen scraps like onion skins, beetroot peels, and red cabbage leaves into vibrant natural dyes by chopping or crushing them and simmering in water for about 30 minutes. Strain the liquid, then soak fabrics, yarns, or papers to achieve beautiful hues. Adding vinegar or alum helps fix the colors, while pH levels and temperature influence shades. Keep exploring, and you’ll discover more ways to create stunning, eco-friendly dyes from everyday waste.
Key Takeaways
- Collect kitchen scraps like onion skins, beetroot peels, and avocado pits as sustainable dye sources.
- Simmer plant materials in water for 30 minutes to extract vibrant natural pigments.
- Strain the dye liquid and soak fabrics or paper to achieve desired color intensity.
- Fix dyes with mordants like vinegar or alum to enhance color fastness and brightness.
- Adjust pH with acidic or alkaline substances to modify hue and create a diverse color palette.
Have you ever wondered how to create vibrant, eco-friendly dyes at home? It’s easier than you might think, and the best part is, you can make stunning colors using simple kitchen scraps. By harnessing plant based pigments, you turn everyday leftovers into natural dyes that are safe for you and the environment. This approach not only reduces waste but also provides a sustainable way to add color to your projects.
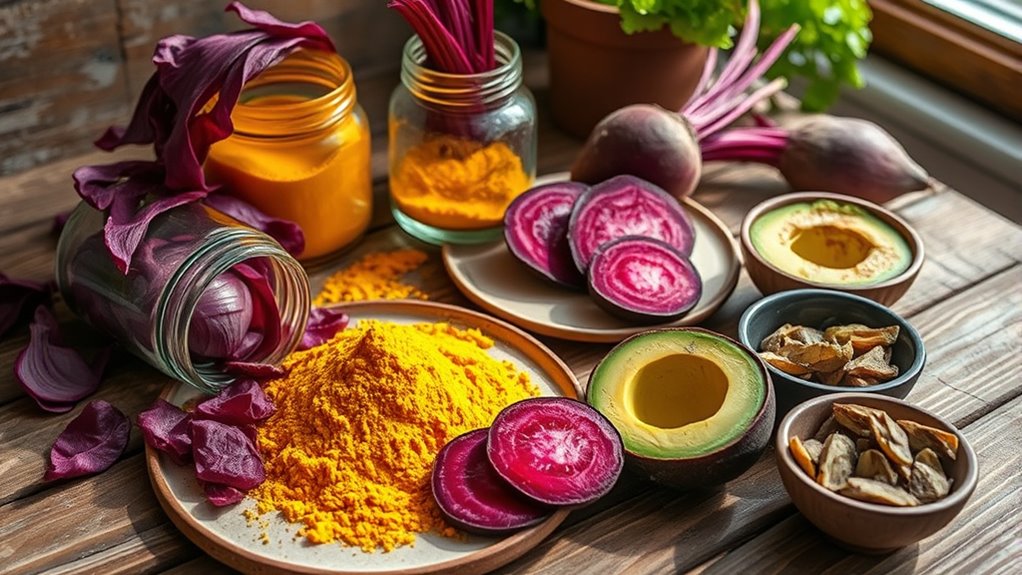
To start, gather your plant-based materials. Onion skins, beetroot peels, avocado pits, red cabbage leaves, turmeric, and spinach stems are fantastic sources of natural color. These ingredients contain natural pigments that, when properly extracted, can produce a variety of hues—from warm yellows and oranges to deep purples and greens. Using kitchen scraps for eco friendly coloring means you’re repurposing waste, which is good for the planet and cost-effective.
Gather natural color from kitchen scraps like onion skins, beetroot peels, and cabbage leaves for eco-friendly dyes.
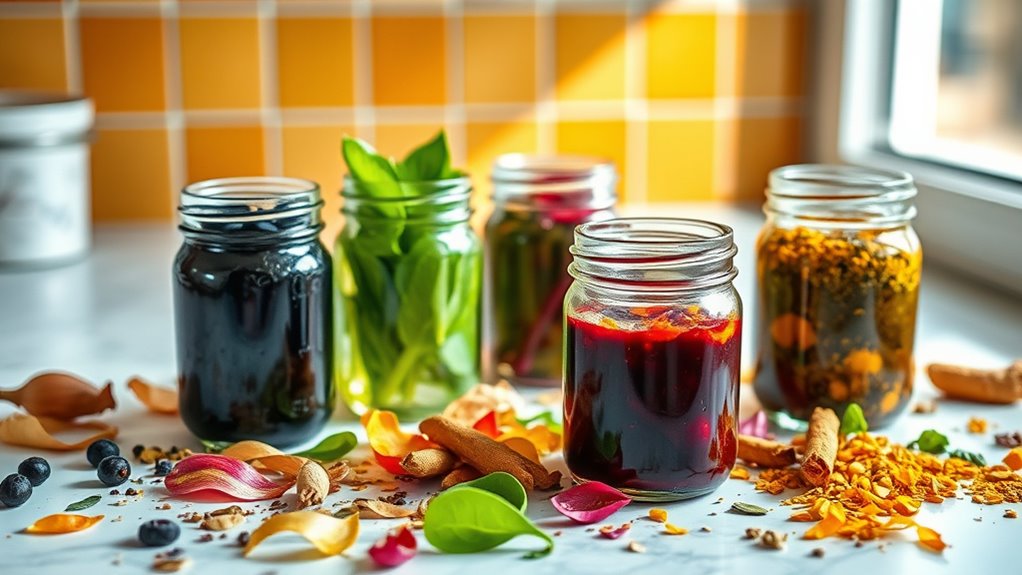
The process is straightforward. For most plant based pigments, you’ll want to chop or crush the material to increase surface area, then simmer it in water. For example, boil onion skins for about 30 minutes to release a rich amber hue, or simmer red cabbage for a vibrant purple. Strain the liquid to remove solids, then soak your fabric, yarn, or paper in the dye bath. The longer you leave it, the more intense the color will become. Remember, natural dyeing often requires mordants—substances like vinegar or alum—to help fix the dye and improve color fastness. Additionally, understanding the chemical properties of your dyes can help you achieve more consistent and vibrant results.
As you experiment, you’ll discover that different plant scraps yield different shades depending on factors like pH and temperature. Adding acidity, such as a splash of lemon juice, can brighten certain colors, while baking soda can shift hues toward the cooler spectrum. This flexibility allows you to create a broad palette using only natural ingredients. Plus, since you’re working with plant based pigments, you’re producing eco friendly coloring that’s biodegradable and free from harmful chemicals found in synthetic dyes.
Additionally, understanding the role of contrast ratio in your projects can help you achieve more vibrant and visually appealing results by selecting the right dyeing techniques. Once you master the extraction process, you can incorporate these natural dyes into various crafts, from fabric dyeing to home decor. The process is not only sustainable but also deeply satisfying—knowing that your beautiful colors come from nature’s gifts. Plus, it’s a fantastic way to teach kids about eco consciousness and the importance of reducing chemical use in everyday life. With a little patience and curiosity, you’ll find that turning kitchen scraps into vibrant, eco-friendly dyes is a fun, creative, and environmentally responsible way to add color to your world.
Frequently Asked Questions
What Safety Precautions Should I Take When Dyeing With Kitchen Scraps?
When dyeing with kitchen scraps, you should prioritize safety by washing your hands thoroughly to prevent contamination. Be mindful of food safety, especially if you’re using scraps that could harbor bacteria. Also, consider allergy awareness—avoid ingredients that might cause allergic reactions. Use gloves if needed, and work in a well-ventilated area. Always identify your scraps clearly to prevent accidental ingestion or contact with allergens.
How Long Do Natural Dyes Typically Last on Fabrics?
Did you know natural dyes can last up to 6 months to 2 years on fabrics? The longevity depends on factors like fiber type and dye stability. You’ll want to use mordants to enhance colorfastness and proper washing techniques to maintain vibrant hues. Generally, natural dyes on cotton or wool tend to last longer than on silk or linen. Proper care guarantees your colorful creations stay beautiful for years to come.
Can I Reuse Leftover Dye Solutions for Future Projects?
You can definitely reuse leftover dye solutions for future projects. To do so, store them properly in airtight containers in a cool, dark place to prevent spoilage. Reusing dye solutions works best if they haven’t been exposed to air for too long or contaminated. Always strain the solution to remove any debris, and label the container with the date. This way, you maximize your dye’s lifespan and reduce waste.
Are Natural Dyes Colorfast on Different Types of Fabrics?
You wonder if natural dyes stay colorfast on different fabrics. The answer depends on fiber absorption and mordant effects. Some fibers, like wool and silk, absorb dye better and hold color longer, while cotton may need a mordant to improve colorfastness. Always test your dye on a small fabric piece first, and consider using a mordant to enhance durability and prevent fading over time.
How Do I Fix or Set the Color After Dyeing?
To fix or set the color after dyeing, you should rinse your fabric in cool water first. Then, soak it in a mordant or a fixative solution, like vinegar or salt, depending on the dye. This helps secure or establish the dye, making it more colorfast. Always follow specific instructions for each dye type, and rinse thoroughly after fixing the color to ensure it stays vibrant and doesn’t bleed.
Conclusion
Don’t worry if you’re new to natural dyes—you don’t need fancy equipment or expensive ingredients. Just use what’s already in your kitchen, and you’ll create beautiful, eco-friendly colors effortlessly. Even if your first attempt isn’t perfect, you’re reducing waste and learning a new skill that’s fun and sustainable. So go ahead, experiment with scraps, and enjoy turning everyday kitchen leftovers into vibrant, natural dyes. It’s easier than you think, and the results are worth it!